How to Customize Maintenance Mode Plugin for your WordPress Site
Maintenance Mode Plugin comes handy when you need to put down your WordPress site and you don’t want to tell your readers that you are completely gone, you need to tell them that you’re “Coming Back Soon” after a few hours or days, hand on.
To activate Maintenance Mode Plugin on your WordPress site you need to activate the Maintenance Mode Plugin and the all the work will be handled by the plugin. But! if you want to customize the look and feel of the Maintenance Mode Page which will be viewed by your readers here are some tips for that.
Maintenance Mode Plugin
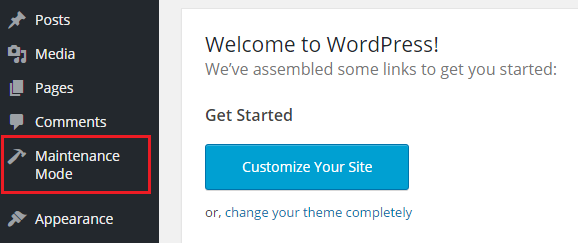
After activating the Maintenance Mode Plugin from your Plugins Directory, you’ll see the Maintenance Mode in the Dashboard’s Menu of your WordPress site. Go into the Maintenance Mode settings from there. You’ll find all the settings to customize the look and feel of your activated Maintenance Page.
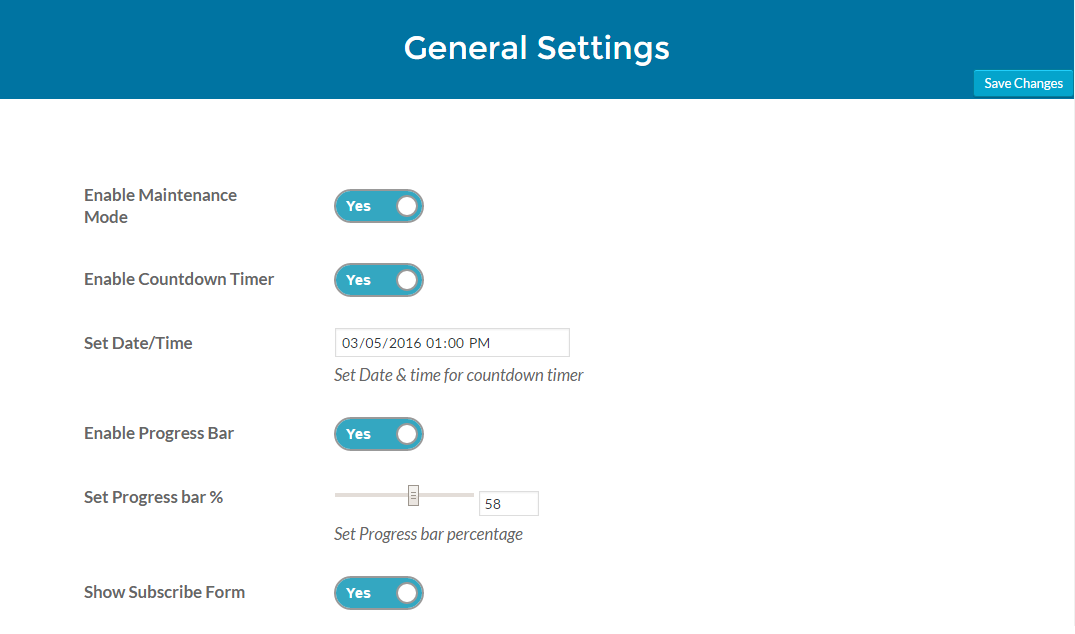
Step 1: General Settings
In this tab, you’ll find the basic Maintenance Mode Plugin settings to manage your Maintenance page of your WordPress site. Set these options according to your needs.
| Enable Maintenance Mode | This option will Enable/Disable Maintainance Mode Page on your WordPress site Select: YES |
| Enable Countdown Timer | This option will help you to add the timer with option of Month/Day/Year and Hours:Minutes:Seconds Enable: YES |
| Set Date/Time | Here you can set the Date & Time of your site when it will be up and running Date/Time for me: 03/05/2016 01:00 PM |
| Enable Progress Bar | This option will activate the progress bar to tell your reader how much Maintenance has been done Progress Bar: YES |
| Set Progress % | This option will allow you to set the progress of your Maintenance Progress Completed: 58% for my website |
| Show Subscribe Form | This option will help your reader to subscribe to your site, when you are done with maintenance you can tell your reader by mail. Subscribe Form: YES |
General Settings
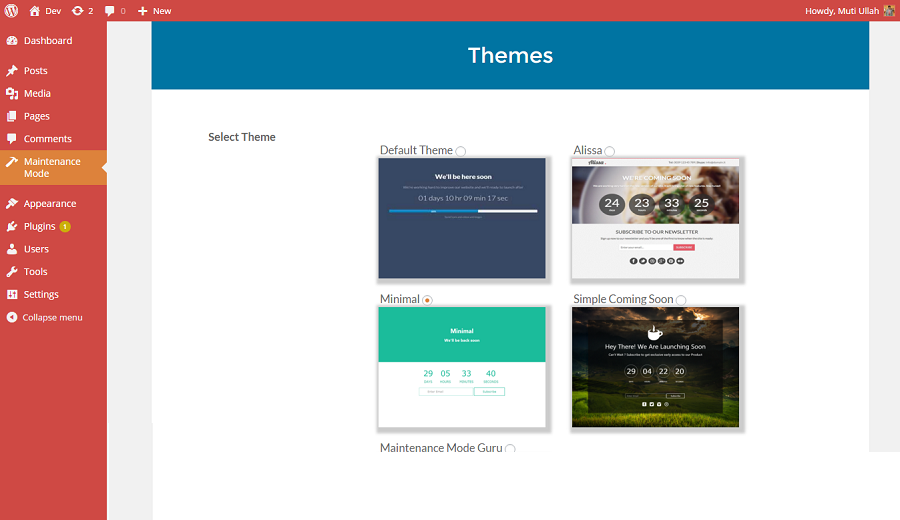
Step 2: Select Suitable Theme
In the Themes panel, you’ll find 5 pre-designed Maintenance Mode themes for your WordPress site’s Maintenance Mode Page. You can select any theme you like and also can customize it. I’ll go with the Default Theme.
Step 3: Some Page Settings
In this panel you’ll find the options to edit default theme’s logo and text for readers so you tell them you are working and you’ll be back soon.
| Logo | This option will let you choose the logo for your Maintenance Mode Page |
| Headline | This option will let you edit the Headline for your Maintenance Mode Page |
| Tagline | Some themes use the tagline like “Alissa Theme”, so here is the option to set Tagline |
| Message | This option will let you set the Message for your Maintenance Page so you reader know what you are up to |

Step 3: Design Settings
In the Design panel, you’ll find all the options to add some spice in your Maintenance Page like Background Image, Text Color Option, Links Color Option etc. You can choose settings from here as it fit for your Maintence Page. I’ve selected settings of my choice as you can see in the image. I selected the simple Background Color you can also go with Background Image Option if you want to add Background Image on your Maintenance Mode Page.
NOTE: Don’t forget to Enable “Responsive Background” option while selecting the Background Image.
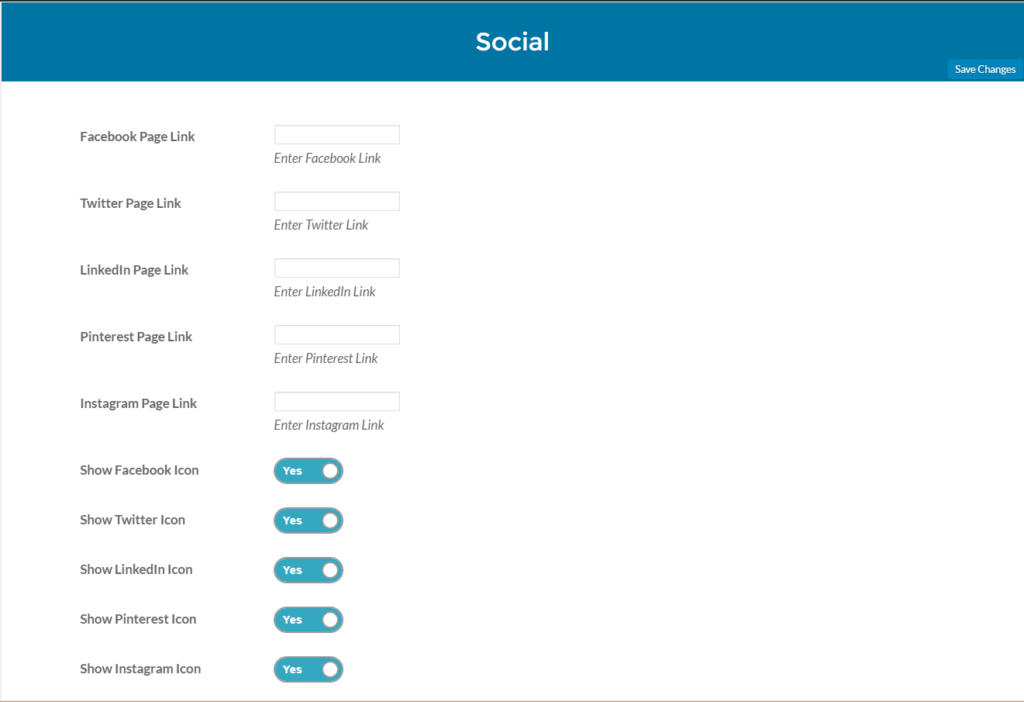
Step 5: Social Settings:
You can add social buttons to your Maintenance Page so if your reader want to switch to your social network feed to follow you there. Here are 5 most used social networks you can add to your Maintenance Page. To activate the social button just enable the corresponding social network and set the URL for your social networks.
After these settings just click on “Save Settings” button and you are done with customizing your Maintenance Mode Page for you WordPress site.
Here is the final preview which we have made:
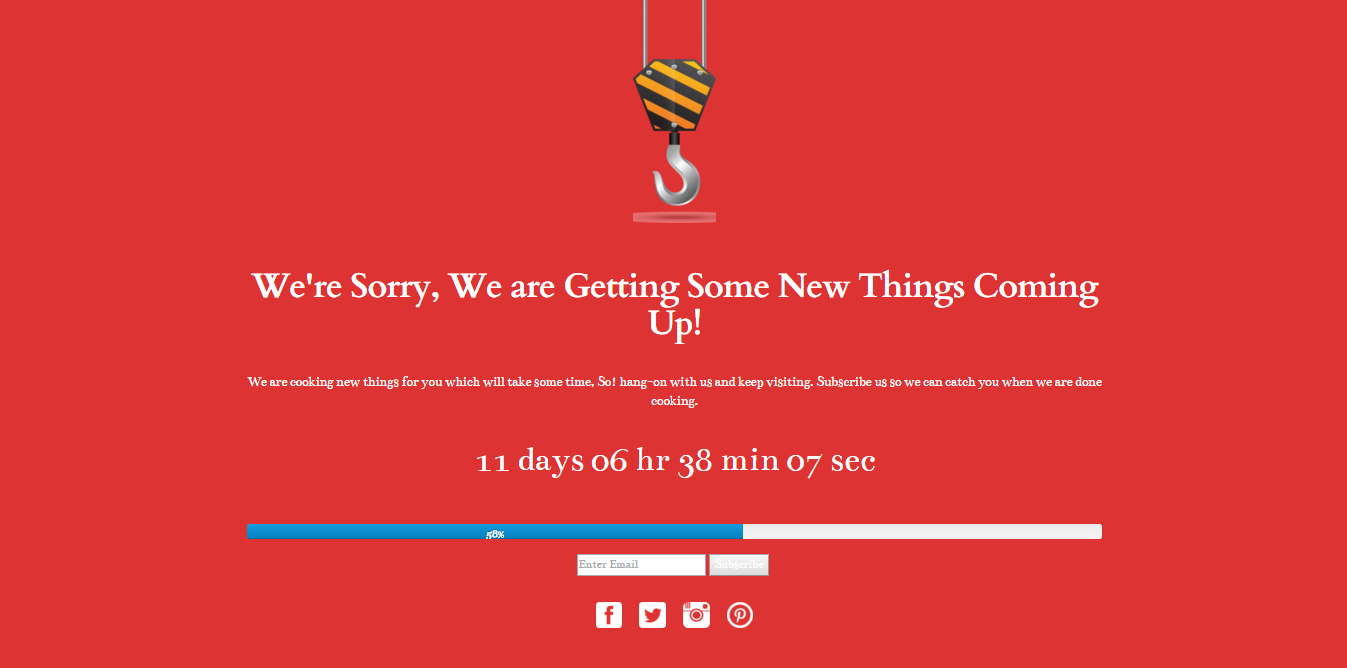
Preview